This is the blog for our AS foundation portfolio. This is a step by step blog showing you how our opening sequence became what it is today. Hope you enjoy!
Nic, Peter and Frankie
Thursday, 26 January 2012
Friday, 30 April 2010
Wednesday, 31 March 2010
Tuesday, 23 March 2010
Sound Effects
In our opening sequence we used a lot of different sounds, diegetic and non-diegetic.
We used three non-diegetic music tracks over our sequence to add to the atmosphere at the time. One spooky (Which added tension to the sequence), one up beat (when there was action) and another more calm (after everything had been resolved). These all happen at key parts of the open sequence.
We mostly used diegetic sounds such as blood hits, gun shots, contact hits and zombie noises. These add to the realism of the film and make a much better impact to the audience. These had to be added in at the right time otherwise it wouldn't give a good effect, in fact it would give the complete opposite.
To get the right sounds it took a while searching around on the Internet for royalty free sounds. After searching for a long time we found some decent gun noises to add.
Peter did the zombie noises himself by using a programme at home where he could record his voice using audacity, and made zombie like noises. He tried to get as near as he could to the sound of the zombies from 28 days later.
By Nic
Wednesday, 17 March 2010
How We Applied Effects
In our opening sequence we have added many effects from spooky mist to gory blood. It was hard to get the effects to look like they were realistic and in the scene and not just stuck on the screen. To achieve this we had to use a number of masking techniques and motion tracking some footage.
Adding Mist:
To add atmosphere to our opening scene around the church we have placed the effect of mist to give it a more eerie feel, and emphasise the genre. First we had to motion track the footage.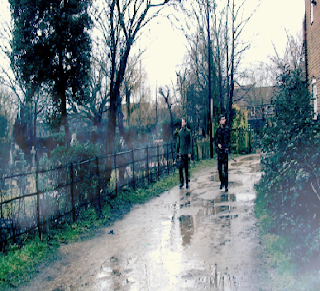 Next we used the masking techniques to make it look like the mist was behind certain objects and then blurred it a little bit to get rid of the sharpness around the mask, then we tied the mask with the motion tracking so when the camera moves the mist would stay where it was first placed and not follow the camera as if it was stuck on the screen, this makes the effect look like it really is in the scene and not placed on. We added a tint of blue into the mist to give the chilly feel.
Adding Blood:
We used blood effects a lot in the opening sequence to give the sense of more realism.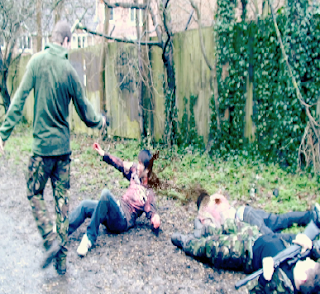 The blood is fairly simply to apply. All we had to do was place the effect on the footage then move it into place of where it would be. Then we would darken the blood to make it look more like real and not like paint. Next we would move the blood frame-by-frame to the right place and so that it flows well and looks good when playing. We would also have to synchronized the blood with the blood shot noise otherwise it would look fake. Yet again we would mask around the blood when it is behind certain objects.
Making The Footage Look Like Its Dawn
We realised that when we played the footage that it was to light and wouldnt fit in with a thriller/horror genre. So we decided to make it look like it was darker to add to the atmosphere of the opening.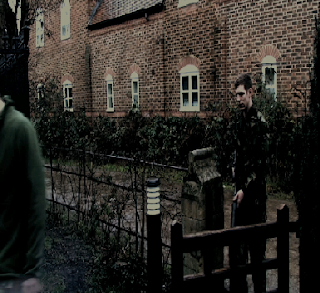 To do this we had to adjust the satuation and bring it down. Then we had to bring down the colour of blue, red and green, this darkened the footage even more, this made it look like it really was dark instead of giving the footage a cheap fake darkened look.
Flashes From Gun Fire
We decided that even unnoticeable effects still add the the opening sequence.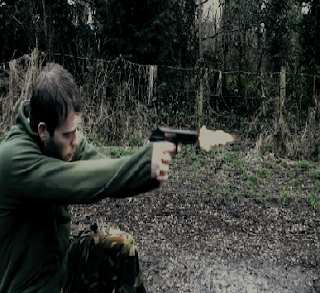 We added gun flashes for when ever the gun fires, which is a simply but long task. First we got to the frame where the muzzle flash of the gun appears then we start to mask around the points where we thought the gun flash would appear. Now we changed the gamma of the colour levels to make it more white, we then decreased the blue levels and increase the red to give the mask a yellow colour. Now we feathered around the mask to get rid of the sharpness of the edges. This flash only lasts for one frame, so it is hard to see, but adds to the realism of the footage without the viewer realising.
The Headshot
This by far took the most time and concentration to do. Doing this headshot involved amazing techniques. Firstly we had to decide the point where the head would of been shot.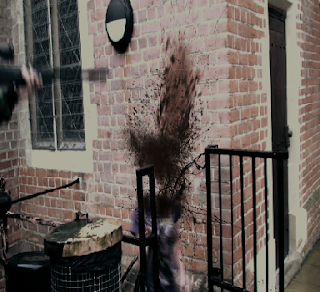 Now, we new that we would be doing this headshot while filming, so we took a still frame of the same shot. Now we cut around the actors exploding head with a mask frame by frame till they came out of the shot, once we had finished this the head was cut out. We then placed the still frame underneath the footage layer, this means that the whole where the head was cut out will now show the still frame (Which would be what would normally be behind the head). Now we added the blood which was explained above. However, this time we have blood on the wall, this is achieved by sizing the blood up to how we wanted then making the effect 3D so that we could apply it to the wall at the angle that it would actually be, yet again increasing the realism of the footage.
By Nic
Adding Mist:
To add atmosphere to our opening scene around the church we have placed the effect of mist to give it a more eerie feel, and emphasise the genre. First we had to motion track the footage.
 Next we used the masking techniques to make it look like the mist was behind certain objects and then blurred it a little bit to get rid of the sharpness around the mask, then we tied the mask with the motion tracking so when the camera moves the mist would stay where it was first placed and not follow the camera as if it was stuck on the screen, this makes the effect look like it really is in the scene and not placed on. We added a tint of blue into the mist to give the chilly feel.
Adding Blood:
We used blood effects a lot in the opening sequence to give the sense of more realism.
 The blood is fairly simply to apply. All we had to do was place the effect on the footage then move it into place of where it would be. Then we would darken the blood to make it look more like real and not like paint. Next we would move the blood frame-by-frame to the right place and so that it flows well and looks good when playing. We would also have to synchronized the blood with the blood shot noise otherwise it would look fake. Yet again we would mask around the blood when it is behind certain objects.
Making The Footage Look Like Its Dawn
We realised that when we played the footage that it was to light and wouldnt fit in with a thriller/horror genre. So we decided to make it look like it was darker to add to the atmosphere of the opening.
 To do this we had to adjust the satuation and bring it down. Then we had to bring down the colour of blue, red and green, this darkened the footage even more, this made it look like it really was dark instead of giving the footage a cheap fake darkened look.
Flashes From Gun Fire
We decided that even unnoticeable effects still add the the opening sequence.
 We added gun flashes for when ever the gun fires, which is a simply but long task. First we got to the frame where the muzzle flash of the gun appears then we start to mask around the points where we thought the gun flash would appear. Now we changed the gamma of the colour levels to make it more white, we then decreased the blue levels and increase the red to give the mask a yellow colour. Now we feathered around the mask to get rid of the sharpness of the edges. This flash only lasts for one frame, so it is hard to see, but adds to the realism of the footage without the viewer realising.
The Headshot
This by far took the most time and concentration to do. Doing this headshot involved amazing techniques. Firstly we had to decide the point where the head would of been shot.
 Now, we new that we would be doing this headshot while filming, so we took a still frame of the same shot. Now we cut around the actors exploding head with a mask frame by frame till they came out of the shot, once we had finished this the head was cut out. We then placed the still frame underneath the footage layer, this means that the whole where the head was cut out will now show the still frame (Which would be what would normally be behind the head). Now we added the blood which was explained above. However, this time we have blood on the wall, this is achieved by sizing the blood up to how we wanted then making the effect 3D so that we could apply it to the wall at the angle that it would actually be, yet again increasing the realism of the footage.
 By Nic
Tuesday, 16 March 2010
What Programs We Used
We used only a few programs but they did the job that we needed. For the editing and effects we used Adobe After Effects CS4 and a expansion for the effects which is Action Essentials 2.
For the sound effects that we recorded we used Line 6 Tone Port GX to record direct to the computer. Then we used Audacity to record it.
By Nic
For the sound effects that we recorded we used Line 6 Tone Port GX to record direct to the computer. Then we used Audacity to record it.
By Nic
Friday, 26 February 2010
Second Day of Filming
On the second day of filming we were luckey as it rained again so we didnt have to worry about the mise-en-scene being different to the first day. But we got most of our shots done on the first day so all we did was re-do shots we didnt like or add in shots we wanted. We followed on filming from the previous day and preceeded to film the climax of the opening scene and the main action scene. This involved all actors on set, all props and clothes we used for the zombies. we filmed these scenes from many different angles to create a good effect, we also made sure we used the environment to our advantage. Overall the second day of filming was a success as we got alot done.
By Peter
By Peter
Subscribe to:
Comments (Atom)


